Showing posts with label Cheese. Show all posts

Sunday, May 20, 2012

Stovetop Broccoli and Cheese Chicken Pasta

I am always looking for new dinner recipes. We honestly eat very simple dinners around my house. This recipe was very tasty. I also loved it because I had all of it on hand. I love when I can make a dinner and not have to go to the grocery store to get everything that is in the dish. I mean don't get me wrong I love going to the grocery store (this actually is true) but mostly because I love food. This recipe was fairly easy, very tasty, and didn't take too long to make. It is also very kid friendly. Again lets be honest, almost everything i like, kids like...I don't think I have gotten my big girl taste buds yet. I was thinking that this recipe is actually quite healthy, but then I remembered the cube of butter that is in the sauce. I personally don't think butter is bad for you, but it definitely isn't low fat or low in cholesterol.  But again, I love butter and use it a lot of recipes!


 Stovetop Broccoli and Cheese Chicken Pasta


1 pound thin egg noodles
1 stick unsalted butter
1/2 cup all purpose flour
1 teaspoon kosher salt
1/2 teaspoon freshly ground black pepper
2 1/2 cups chicken broth
1 1/2 cups shredded cheddar cheese
2 cups shredded cooked chicken breast
1 pound broccoli florets, steamed
1-1 1/2 cups milk

1. Prepare egg noodles according to package directions, drain and run under cool water to stop cooking.

2. Melt butter into a medium saucepan over medium heat. Whisk in flour, salt and pepper, whisking until thick and combined. Slowly whisk in chicken broth until combined. Increase heat to high and whisk until thick and bubbly. Reduce heat to low and stir in cheese until melted.

3. Transfer cooked noodles to a large dutch oven or pot over low-medium heat. Add chicken, broccoli and cheese sauce, stirring; will be thick. Stir in milk to loosen sauce to your liking. Serve immediately. This dish does best when served as soon as possible. If needed to be prepared ahead of time, add additional milk or chicken broth to loosen sauce.

Makes 6 servings

Recipe Source: Picky Palate

Wednesday, May 16, 2012

Cheesy Pull-A-Part Bread

I kind of just threw this recipe together, and loved it so much that I just had to share it with you. It was easy, and we gobbled it up so fast! The 2 cups of cheese is just enough to make it cheesy but not completely covered in cheese. I am a huge cheese fan and would be just fine with even more cheese. Feel free to put as much or as little cheese  as you desire. Also the small the balls of dough are the more cheese you will have throughout the bread. Its so fun having little pockets of yummy cheese throughout the bread!


Cheesy Pull-A-Part Bread

5 1/4 c. white flour
1/4 c. sugar
1 1/2 tsp. salt
1 1/2 rounded tablespoons saf-instant yeast
3 T. oil
2c. hot tap water
Adobo Seasoning *
2 cups Sharp cheddar cheese shredded


Mix dry ingredients to bowl of stand mixer. Add oil and water. Mix for 1 minute and check consistency. If dough is too dry, add a little more water. Dough should clean the bowl of the mixer. Mix for 5 minutes. (Do not add flour to the dough after it has finished mixing.) Grease a bunt pan well. Pull of small golf ball sized pieces of dough and place them in the pan. Do one layer at a time leaving a small amount of space between each ball of dough. Once you have a single layer sprinkle some adobo seasoning on dough. Next sprinkle some cheese on dough. Repeat with another layer of dough, then adobo, then cheese. Repeat this process until you have used all your dough, or your pan is 2/3 the way full. Really this dough recipe makes enough for one huge pan, 2 small pans, or 1 pan and some rolls or whatever you want to do with the extra dough. Cover pan with a dish towel. Let rise 25 minutes. Bake at 350 degrees for 25 minutes or until golden brown on top. While still warm flip onto a serving plate. This will be the real test if you greased you pan well enough. If you haven't it can be a little tricky getting it out of the pan. Hopefully it will come out nicely for you. If you are having trouble getting it out of the pan take a butter knife, or something that won't scratch your pan and gently loosen the edges. Once the edges are loose it should come out beautifully. I prefer this when its warm, but it tastes great when it is cooled as well. You can either serve it in slices or just pull pieces off and eat them.


*If you don't have Adobo, can't find it, or don't want to buy it that is ok. Adobo is just a seasoning that combines salt, garlic, pepper, oregano, and turmeric. Feel free to use your own combination of these things to make a delicious cheesy bread!

Thursday, May 10, 2012

7 Layer Bean Dip

I'll be honest I never thought I was a fan of 7 layer dips. I'm actually a very picky eater and don't like things that most people put in it. So when my husband suggested that we bring a 7 layer bean dip to a super bowl party I looked at it as a challenge. I looked up several recipes, took some recommendations from my husband, and voila this 7 layer bean dip was created. I didn't take a picture of it that day, mostly because I didn't know if I was going to like it. With my first bite I knew that it was love. I honestly don't know if anyone else at the party was able to eat it. My husband and I stayed by that dip and chowed down. I tried to eat other foods, but kept finding myself right back at the bean dip. I was kicking myself all night that I didn't take a picture of it before I started devouring it. I knew this dip was totally blog worthy.

Since that time I haven't really had a reason to make this dip. Today I decided that I was making a reason to make this dip. If you really need to know, we may or may not have just had chips and this dip for dinner. I'm not confessing anything, but I am saying its possible. Regardless of when, where, why, and how much of this dip we ate, the conclusion was that we still love it. The best part is most of the ingredients I have in my house most of the time. I hope you enjoy this dip as much as we do.


 Look at all these delicious layers!

 You better believe that we ate that bite!

7 Layer Bean Dip

1 (16 oz) can re-fried beans
1 (1 oz) package taco seasoning
1 (8 oz) package cream cheese
16 oz sour cream
16 oz salsa
1 large tomato chopped
1 avocado sliced thinly
2 cups sharp cheddar cheese
1 can sliced olives

Directions

  1. In a medium bowl, blend the taco seasoning mix and refried beans. Spread the mixture onto a large serving platter.
  2. Mix the sour cream and cream cheese in a medium bowl. Spread over the refried beans.
  3. Top the layers with salsa. Place a layer of tomato, avocado, and top with Cheddar cheese. Garnish with black olives. 
  4. Enjoy with your favorite chips (my favorite is Fritos or other corn tortilla chip but any chip will work) 
 
Recipe Source: Adapted from Allrecipes 

Sunday, April 1, 2012

Breakfast Casserole

We had a breakfast get together with some friends this weekend. We seem to do this about every 6 months to a year. I am a huge fan of breakfast, so mixing breakfast  and good friends is even better. We also always have very delicious food. My friend made some amazing cinnamon rolls which I am hoping she will post on her blog. I was in charge of making a breakfast casserole. I have made a few different kinds of breakfast casserole but always love trying new recipes. This recipe was so easy to make and turned out delicious. Everyone loved it! I threw it together the night before then let sit in the fridge until the next morning when I was ready to bake it. This way I didn't have to wake up early to make it but it was still warm for everyone to eat. I will definitely be making this recipe again!


Breakfast Casserole

Prep: 15 min. Bake: 35 min. + standing
Yield: 12 Servings

Ingredients
1 pound sliced bacon, diced (I used turkey bacon and loved it)
1 medium sweet onion, chopped
6 eggs, lightly beaten
4 cups frozen shredded hash brown potatoes, thawed
2 cups (8 ounces) shredded cheddar cheese
1-1/2 cups (12 ounces) 4% cottage cheese
1-1/4 cups shredded Swiss cheese

Directions
In a large skillet, cook bacon and onion until bacon is crisp; drain. In a large bowl, combine the remaining ingredients; stir in bacon mixture. Transfer to a greased 13-in. x 9-in. baking dish.
Bake, uncovered, at 350° for 35-40 minutes or until a knife inserted near the center comes out clean. Let stand for 10 minutes before cutting.

Recipe Source: Taste Of Home

Wednesday, February 22, 2012

Grandma's Dutch Oven Chicken (Crock Pot Style)

This is a recipe for my grandma's Dutch Oven Chicken. I will be honest, it is not one of the photogenic foods out there, but oh it sure does taste great! My grandma would always make this in a crock pot, and I always loved it. A few years ago I decided to see if it would work in a crock pot. I love crock pots because I don't really have to think about it. I through everything in it, leave for several hours, and come home to a house that smells amazing! Well lucky for me the crock pot version of this meal works great!


Grandma's Dutch Oven Chicken (Crock Pot Style)
Prep Time: 20 min
Cook Time: 4-6 hrs
Servings: 6-8

Ingredients:
6-8 chicken breasts
6-8 slices of bacon
3 cans cream of chicken soup
16 oz sour cream
8 oz monterey jack cheese - shredded
1 small round container chicken flavored stove top stuffing
1 cube (1/2 cup) butter

Cut bacon into smaller pieces. Lay bacon on the bottom of the crock pot. Place chicken on top of bacon. In a medium bowl combine sour cream and cream of chicken soup. Pour soup mixture over top of chicken. Sprinkle shredded cheese over top of soup mixture. Sprinkle dry stove top stuffing mix over top of cheese. Place small chunks of butter evenly over top of stuffing mix. Cover with lid of crock pot and let cook on low for approximately 6 hrs.  My crock pot cooks a little hot and it was done in about 5. Test a piece of chicken for done-ness prior to serving.


Thursday, February 16, 2012

Cheese Blintzes

I hope all of you had a wonderful Valentines Day! The last few years my husband and I have taken the train to Denver for Valentines Day. This year we stayed in a cute little bed and breakfast in down town Denver. We had a great time! We also love taking the train places. On this trip one of the things they were serving in the dining car of the train for breakfast were cheese blintzes. My husband had never heard of these before. Now train food is ok, but when they said they cooked the cheese blintzes in the microwave I just couldn't bare to try them. I told my husband I would make him some when we got home. I absolutely love a good cheese blintze! Most of you know that anything that you can call breakfast, but really could be eaten as a dessert is ok in my book. I think these are such a yummy variation to a traditional crepe. This recipe is very easy and so worth any work you put into it! If you have never tried cheese blintzes this recipe is a very basic recipe and can be dolled up any way you want.

Cheese Blintzes

12 6-8 inch crepes
2 8 oz packages cream cheese (sorry, low-fat will not work here)
1 cup cottage cheese or ricotta cheese
2/3 cup sugar
1/8 tsp salt
1 tsp vanilla extract
3 T melted butter

Toppings:
Applesauce
Fruit
Jam
Sour cream
Syrup

1. Heat oven to 375 degrees and brush a 9x13 pan with melted butter. Stir cream cheese, cottage cheese, sugar, salt and vanilla extra in a medium bowl with a wooden spoon until blended. 

2. To fill each crepe, spoon 3 T of filling cream cheese mixture in the center of once crepe, then fold the bottom part of the crepe up over the filling, followed by folding both sides in, and finally folding the top down. Place seam side down in prepared baking dish. Repeat with remaining ingredients.

3. Brush the tops of each blintz with melted butter and place in oven. Bake for 10-15 minutes, or until they are puffed and turning golden in color. Remove from oven. I have also done this step in a frying pan with some butter, flipping once browned. If choosing this option you have to be very careful not to tear the delicate crepe when flipping.

4. To serve, top blintzes with your choice of applesauce, fruit, jam, sour cream or syrup. If you are feeling spunky you can also put the fruit on the inside!


Recipe Source: Heat Oven To 350

Thursday, February 9, 2012

Pepperoni Pizza Puffs

I love easy dinner meals. I do not enjoy spending hours on a meal unless I have the time and really want to (trust me these days are very few and far between). That means most nights I am wanting to make something quick and easy. If you want to know my deep dark little secret (really its no secret to those that know me) we eat Mac and Cheese at least on a weekly basis (I have a deep love in my heart for mac and cheese). For me there are many nights each week at approximately seven o'clock where I am left asking myself what we should eat for dinner. Since I ran into this recipe it has made a few of my nights much easier. I absolutely love these tasty bite sized little dinner snacks, and they take hardly any time at all to make! I knew after the first time that I made them that the recipe was a keeper for sure. I have made them with regular pepperoni and turkey pepperoni. Both taste great, the regular pepperoni is just more greasy and leaves the puffs being a little bit more greasy as well. I don't have kids yet but I know these things would be very kid friendly.


Pepperoni Pizza Puffs

3/4 cup flour
3/4 tsp baking powder
1/2 tsp garlic powder
3/4 cup whole milk
1 egg, lightly beaten
4 oz mozzarella cheese, shredded (about 1 cup)
4 oz turkey pepperoni, (about 1/2 cup) cut into  smaller pieces
4 oz low-fat sausage, cooked and crumbled
1/2 cup pizza sauce

Pre-heat the oven to 375°. Grease a 24-cup mini-muffin pan. In a large bowl, whisk together the flour, garlic powder and baking powder; whisk in the milk and egg. Stir in the mozzarella and pepperoni; let stand for 10 minutes.

Stir the batter and divide among the mini-muffin cups. Bake until puffed and golden, 20 to 25 minutes.

Meanwhile, microwave the pizza sauce until warmed through. Serve the puffs with the pizza sauce for dipping. My husband is all about the pizza sauce but personally I prefer to dip them in ranch.

Enjoy!


Recipe Source: Adapted slightly from: Make Ahead Meals

Friday, January 20, 2012

Cheesy Garlic Bread Sticks

This is another great post courtesy of Pinterest. I saw this a while ago and have had it in the back of my mind. Today I finally decided to make it and guess what...It's fantastic! I mean really how can you go wrong with garlic butter, two cheeses, and bread? These are all some of my favorite things! To be honest I used to have a slight problem with marinara sauce. I have almost completely gotten over my problem, but as a kid I didn't even like pizza. I mean what kid doesn't like pizza? Well I have never claimed to be a normal eater, but surprisingly my tastes have expanded to include pizza. I actually really enjoy pizza now, but if the option is there I will still usually get one with a white sauce or something kinda different. Regardless of my current pizza likings, this garlic cheese bread is a perfect companion for any pizza, or really any meal. We kinda ate it as our entire meal (again, I'm not claiming that my eating habits are normal). 

You can make this with your favorite pizza dough, but just in case you don't have a favorite pizza dough recipe I have put one on here as well.

Cheesy Garlic Bread Sticks
yield: 1- 12 inch pie

Ingredients:
1/2 recipe Fail-Proof Pizza Dough (recipe below)
2 tablespoons softened salted butter
2 cloves garlic, finely minced
1/4 cup grated parmesan cheese {use the real stuff!}
1/4 pound grated mozzarella cheese
{salt & pepper, if desired}

Directions:
Preheat oven to 500 degrees with pizza stone inside. {If you don’t have a pizza stone, use an upside down cookie sheet}

Mix butter and garlic in a small bowl and set aside.

Spread pizza dough out into a 12-inch circle on parchment paper. {This makes it easier to transfer to the pizza stone.}

Spread the butter and garlic mixture over dough and top with parmesan and mozzarella cheeses. Top with a light sprinkling of salt and pepper, if desired.

Bake 9-10 minutes or until bubbly and golden. Remove from oven and cool 1-2 minutes before cutting. Serve hot, with marinara {if desired}. 


Basic Pizza Dough
yield: 2-12 inch pizzas, approximately 1 lb. of dough


Ingredients:
1 cup warm water
2 1/4 teaspoons active dry yeast
1 tablespoon honey {or sugar}
2 teaspoons salt
2 tablespoons olive or canola oil
3 cups bread flour {give or take 1/2 cup…depending on the heat & humidity}

Directions:
In a large mixing bowl, preferably that of a stand mixer, stir yeast and honey into warm water. Sit for 5-10 minutes or until bubbles form and mixture starts to foam. This tells you that the yeast is alive and kicking. Pour in salt, oil and half the flour and mix.

Once that flour is incorporated, start adding flour in bit by bit until you get the pizza dough to the consistency you want: slightly tacky, but when you touch it it doesn’t stick to your hands.

Once you reach this stage, turn the mixer on high to knead for 6 minutes. Turn a timer on and walk away! Resist the temptation to stop earlier than 6 minutes! That seems to be the magical number. It should look something like this when it’s done! The dough should be smooth and easy to work with. And the bowl should be clean!

Lightly grease the bowl & the dough so it doesn’t dry out, cover with plastic wrap and let it rise 1-2 hours. That’s it!

Recipe Source: Lauren's Latest


Wednesday, January 11, 2012

Deliciousness Salad

I love salads that combine fruit and vegetables! I love the sweet taste combined with a good vinaigrette dressing. I have my favorite strawberry salad already posted on this blog (which is to die for) but really has a lot of sugar. This salad is a delicious combination of a traditional salad with a slight hint of sweetness obtained from the fruit.  The first time we had this salad my husband was the instigator on getting the recipe. He loved it! I have been making this salad ever since.
Deliciousness Salad

1 head romaine lettuce
1 bag spinach
10 sliced up strawberries
2 cans mandarin oranges
Croutons
Sunflower seeds
Shredded cheddar cheese
Olive Oil and Vinegar Dressing
  - any vinaigrette would work. That's just the one we really like.

Directions
Cut or tear romaine lettuce into desired size. Rinse both your romaine lettuce and spinach. Combine romaine lettuce and spinach in a large salad bowl. Top with sliced strawberries, mandarin oranges, croutons, sunflower seeds, and shredded cheese. Right before serving add dressing and toss to combine.

Thanks Sarah for the great Recipe!

Thursday, December 29, 2011

Strawberry Salad

I always love a good salad. I will be honest though, this salad with the dressing is more like a dessert. The combination of strawberries, Craisins, and the fabulousness of the dressing is just heavenly.  Its probably not the most healthy salad, but is absolutely to die for! If you are looking for a crowd pleaser of a salad this is it! This is another delicious recipe courtesy of my wonderful mother.


Strawberry Salad
 
1 head of romaine lettuce
10 Strawberries sliced
1/2 cup Craisins
8 oz Feta Cheese
Candied Almonds or plain pine nuts
 
Wash and cut lettuce. Place in a large salad bowl. Top with remaining ingredients and toss lightly to combine.
*To candy the almonds, place almonds in frying pan.  Pour a lot of sugar to cover over the top.  Stir over medium heat until the sugar melts and coat the almonds.  It seems like it takes forever for the sugar to melt but it does!
 
Strawberry Poppy Seed Dressing
 
1 1/2 cups sugar
2 tsp. dry mustard
1 tsp. salt
2/3 cup rice vinegar (I have also used apple cider vinegar with good results)
4 tbl. red onion
4 fresh strawberries
1 tbl. water
1 1/2 cups canola oil
4 tsp. poppy seed
  
Throw all ingredients in the blender and puree.

Wednesday, December 7, 2011

Chicken Cordon Bleu Casserole

I found this recipe years ago and absolutely loved it! A good friend of mine recently asked me for the recipe and I had honestly kinda forgotten about it. I was so excited she reminded me about it that I just had to make it! This recipe has all the flavor of traditional chicken cordon bleu, but is much easier to make. I love it because I can honestly throw it together in  under 10 minutes, have it in the oven and ready to eat it in no time at all! I typically am all about making everything from scratch, but sometimes it is very nice to have a meal that is quick and easy with practically no prep on your part. What can I say...life gets busy sometimes!


Chicken Cordon Bleu Casserole
Servings: 8
Prep Time: 5-10 minutes
Bake Time: 30 minutes

Ingredients
1.5 lbs popcorn chicken ** (I prefer the popcorn chicken, but regular chicken nuggets can be used)
8 ounces Swiss cheese, cubed
8 ounces cubed ham
1 (10.75 ounce) can condensed cream of chicken soup
1 cup milk

Directions

Preheat oven to 350 degrees F (175 degrees C).

Place chicken  in a glass baking dish, along with the Swiss cheese, and ham. Stir together the soup with 1 cup milk, pour over casserole.
Bake in preheated oven until golden brown and bubbly, about 30 minutes.

**If you prefer to make the breaded chicken from scratch that is definitely an option and will taste just as delicious, it just take a little more time.

Recipe Source: Adapted from Allrecipes

Friday, December 2, 2011

Wisconsin Cauliflower Soup

Tis the season...for soup! I absolutely love soups. To be specific I love creamy cheesy soups! Since it has been getting quite cold around these parts I have been wanting and making more and more soups. I love something warm when its all cold outside. This soup fits all of my criteria for a soup that I love. I also kinda love that it is pureed until smooth. I love smooth creamy soups, and if you have children (or picky husbands) they won't even know that there is cauliflower in it!


Wisconsin Cauliflower Soup

2 tablespoon butter or margarine
1 medium onion, chopped
1/4 cup all-purpose flour
1/2 teaspoon salt
2 cups milk**
1 1/2 cups water**
1 can (13 3/4 to 14 1/2 ounces) chicken broth
1 head (2 1/2 pounds) cauliflower, cut into 1-inch chunks
1 teaspoon Dijon mustard
1 1/2 cups sharp cheddar cheese, shredded
1/2 cup Pepper Jack cheese, shredded
Season with salt and pepper as desired

**Can substitute 1 can {12 oz} evaporated milk and 2 cups water for the 2 cups milk and 1 1/2 cups water.

In a large saucepan, melt margarine or butter over medium heat. Add onion and cook until golden, about 10 minutes, stirring occasionally. Whisk in flour and salt. Gradually stir in milk, chicken broth, and water.

Add cauliflower and heat to boiling over high heat. Reduce heat to low; cover and simmer until cauliflower is tender, about 15 minutes.

In blender (with center part of blender cover removed to allow steam to escape), blend cauliflower mixture at low speed in small batches until very smooth. {Don't let this step deter you from making the soup! Blending it is really easy and so worth the extra 3 minutes. The most annoying part are the added dishes!}

Return cauliflower mixture to saucepan; heat over medium heat until hot, stirring occasionally. Remove saucepan from heat; stir in mustard and 1 1/2 cups cheese until melted and smooth. Serve soup with remaining cheese as a garnish.

Recipe Source:Adapted slightly from Utah Deal Diva

Monday, October 10, 2011

Olive Garden Alfredo Sauce

Oh how I love food! There are a few restaurants at which I always seem to get the same thing over and over again. Olive Garden is one of those places for me. I have tried to figure out how they make such good Alfredo sauce. I have tried several different recipes, all of which have turned out good, but not quite the same. The other day I was talking with some of my wonderful co-workers discussing food (of course). Olive Garden, their bread sticks, and their Alfredo sauce came up. We were all stuck on the idea and practically salivating just thinking of it. I called my sweet husband and had him go pick us some up. It was wonderful! While we were on their website we realized that they had recipes. They actually have their Alfredo sauce recipe on their site. I of course had to try it just so I could share with all of you my results. I'm not really sure that it is 100% the same, but the taste is pretty much amazing. This is the best Alfredo sauce I have ever made. I will continue to try and tweak it to see if I can't get it to taste just like the real stuff.


Alfredo Sauce

Prep Time: 10 minutes
Cook Time:10 minutes
Serving Size:4
Ingredients

1 1/2 cup milk

1 1/2 cup heavy cream

1/2 cup imported Parmesan cheese, grated

1/2 cup imported Romano cheese, grated

6 egg yolks from fresh jumbo eggs

Salt and black pepper to taste


Procedures

HEAT milk and cream in a heavy bottom saucepan until it begins to simmer. Turn off heat. Slowly whip in cheese, then remove from heat.

PLACE egg yolks in a separate bowl and slowly whip in a portion of the hot milk and cream mixture. Slowly add egg yolk mixture back into remaining cream mixture. Place back on very low heat and continually stir until simmering. Take sauce off heat so it thickens. (This will increase temperature of egg yolks, known as tempering).

SEASON to taste with salt and black pepper. Serve over your favorite pasta.

Recipe Source: Olive Garden

Wednesday, October 5, 2011

Whipped Cream Cream Cheese Frosting

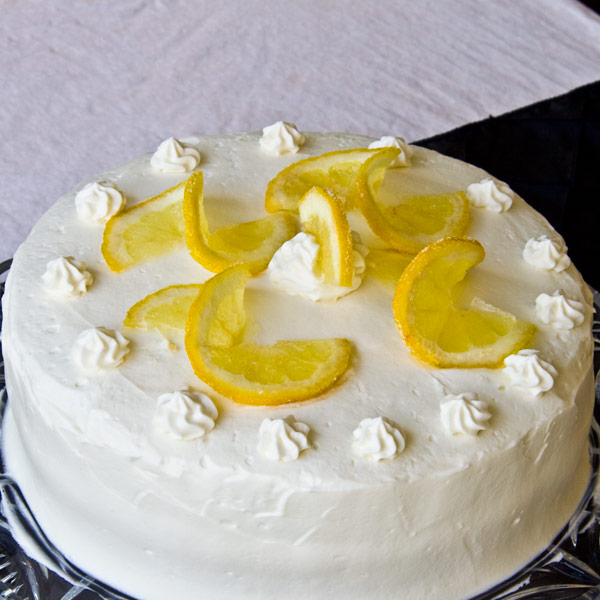
This frosting is so good that I think it deserved its own post. I absolutely love cream cheese frosting. I think they are heavenly especially when combined with some sort of delectable cake or brownie.  Most cream cheese frosting are heavy and rich (not a bad thing if you ask me). This cream cheese frosting is light and airy, but yet still full of flavor. It would go perfectly on just about any cake. I used it on a delicious lemon cake that I will post in a couple of days.


Whipped Cream Cream Cheese Frosting

Ingredients
1 (8 ounce) package cream cheese (at room temperature
1 1/4 cup white sugar
1/8 teaspoon salt
1 teaspoon vanilla extract
1 1/2 cups heavy whipping cream

Directions
In a small bowl chilled beat whipping cream until very stiff peaks form (if you beat it any longer it will probably turn into butter); set in the fridge.
In a large bowl combine cream cheese, sugar, salt and vanilla. Beat until smooth, then fold in whipped cream. Frost cake as desired.

*Note: This is a very soft light frosting. I was able to frost a 2 layer cake with it and pipe with it a small amount, but this is not an ideal frosting for piping, but it is an ideal frosting for eating so do with it as you please. This is also a delectable fruit dip.


Recipe Source: Adapted from Allrecipes

Friday, September 16, 2011

Chicken Enchiladas

Have I mentioned that I am on a freezer meal kick right now? Well if not, I am. It has been a lot of fun making things and I have already started eating some of them! I knew I wanted to do chicken enchiladas. I have never made them to put in the freezer, but I thought they would work quite well. I realized that I had never actually made the traditional chicken enchiladas. I have made several different varieties of chicken enchiladas, some of which I am sure I will post on here eventually. Growing up my mom mostly made us cheese enchiladas (well at least that's all I remember). I always liked those enchiladas. I am sure there is absolutely nothing healthy about them and that is why I loved them. When I moved off to college I had a roommate that was very picky. She introduced us to a very simple, basic, non-mexican style enchilada. These were the two styles of enchiladas that I was used to. I have since started trying even more types of enchiladas and love them all! This recipe is one that I just threw together so I could put it in the freezer. I wasn't really sure how it was going to turn out. The other day we decided to eat some of the freezer enchiladas and I was very happy with the results!


Chicken Enchiladas

2 lbs shredded chicken
4 oz cream cheese
1/2 tsp cumin
1/2 tsp salt
1/2 tsp pepper
2 clove minced garlic
1 cup mozzarella (or cheddar) cheese
8 flour tortillas
1 can enchilada sauce

Combine shredded chicken and cream cheese. Mix until cream cheese is well combines with the chicken.  Mix in cumin, salt, pepper, and minced garlic. With a spoon or fork scoop out a small piece of chicken and taste it. If it isn't quite as flavorful as you would like ad a little more spices (I have a hard time using exact spice measurements) Mix in 1/2 cup mozzarella or cheddar cheese (whichever you prefer). Using one tortilla at a time place a couple tbs of chicken mixture along center of tortilla. Roll up tortilla around mixture. Place in a 9X13 pan or 2- 8X8 pans. Repeat with remaining tortillas until chicken mixture is gone. Drizzle enchilada sauce over rolled tortillas. Top with remaining cheese. Bake at 375 degrees for 15 minutes or until cheese is melted and heated throughout.

Freezer directions: Prior to baking place pan in freezer and let freeze over night. You can then soak pan in warm water for a few minutes and remove frozen enchiladas from your 8X8 pan and slide it into a gallon size zip lock freezer bag. This frees up you pan and gives you more room in your freezer. Return bag to freezer until ready to use. On baking day remove frozen enchiladas from bag and place back in 8X8 pan. Place in cool oven and set temperature to 375 degrees. Bake for 30-40 minutes or until heated through and cheese is melted.

Wednesday, September 14, 2011

Basic Calzones

This week I have been making freezer meals. Lots and lots of them! It has been fun to just make a bunch of meals on a day off and know that some day in the future I can sit back and relax but still eat a home cooked meal. When trying to figure out what freezer meals to make one of my friends suggested calzones. I thought this was a great idea! I love pizza but this is an easier way to freeze a pizza!

Feel free to use whatever toppings you want. This is a very basic recipe that can be changed and adapted to whatever your likings are.


Basic Calzones
Makes approximately 6-8 medium sized calzones

Dough:
2 1/2 cups warm water
4 teaspoons instant yeast
4 tablespoons sugar
2 tablespoon honey
2  tablespoon olive oil
4 teaspoons salt
3 cups all-purpose flour
3 cups whole wheat flour

Toppings:
2 lbs shredded mozzarella cheese
1 pkg pepperoni
1 jar pizza sauce or spaghetti sauce

Make the dough the night before or early the morning on the day you want to make the pizza. In a large mixing bowl (or in the bowl of a stand mixer), mix the water, yeast, sugar, honey and oil. (If using active dry yeast, increase the amount of yeast to 2 3/4 teaspoons and proof the yeast in the water until foamy before mixing in the sugar, honey and oil.) Then mix in 1 cup flour and the salt. Continue mixing in all the remaining flour until you get a nice, soft dough. Knead until dough is soft and smooth, about 10 minutes by hand or 5 minutes with a stand mixer.
Shape the dough into a ball and place in a lightly greased bowl and cover tightly (with a lid or plastic wrap). Place the dough in the refrigerator to slowly rise until three hours before baking. Three hours before baking, remove the dough from the refrigerator and let it come to room temperature, keeping it lightly covered.

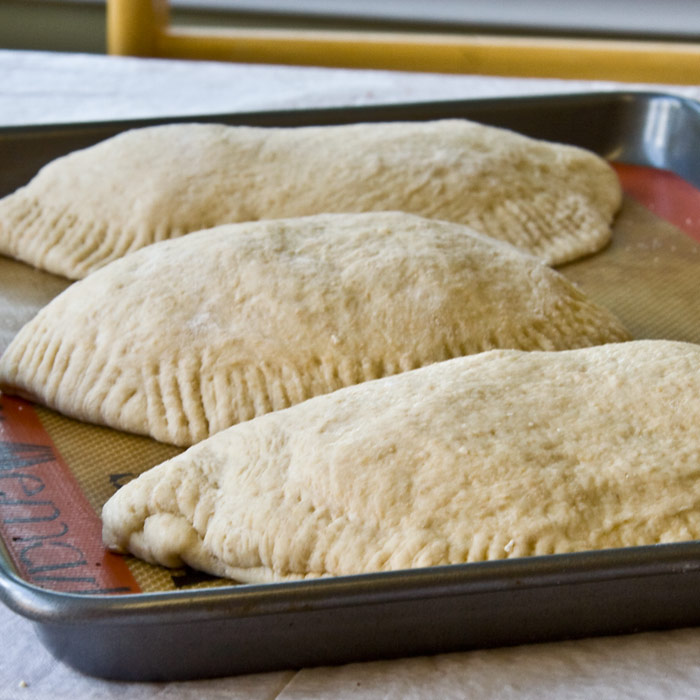
The next day remove dough from fridge about an hour before using. After hour has passed separate dough into 6-8 equal sized pieces. Cover each piece and let rest for about 10 minutes. Using a nonstick mat or a lightly greased counter top, working one at a time, start flattening each piece of dough into a circle.Eventually you’ll want it between six or eight inches in diameter. On the bottom half of the circle spread pizza sauce. Top with cheese and pepperoni (or desired toppings). Grab the top edge of the dough and fold over the toppings. You can stretch the dough if needed to cover entire toppings. Using the tines of a fork, press the edges of the calzone together until well sealed. Carefully lift and place each calzone on a silpat or parchment lined baking sheet.You should be able to fit about 3 moderate sized calzones on each baking sheet. Bake at 400 degrees for 14-15 minutes or until golden brown.

Freezer meal instructions: After calzones are formed place on a baking sheet and place in freezer overnight. Once frozen you can remove from pan and place in zip lock bags and freeze until ready to use. The night before baking place frozen calzones on a greased or silpat lined pan in the fridge to thaw. On baking day take out of fridge 1 hr before baking to bring to room temperature. Once thawed bake as directed above.

Dough recipe source: Mel's Kitchen Cafe

Monday, September 12, 2011

Lasagna

I am very lucky to have lots of family close by. Both my husband's and my family all live withing a 45 minute drive. We always have lots of family stuff going on and are so lucky to get to see all of them so frequently. I currently have 2 sister-in-laws that are pregnant. Both are due around the same time. Even better than getting 2 nieces or nephews I get 3! Yes one of my sister-in-laws is having twins! When all is said and done she will have 5 children. We don't have any kids yet so this to me is mind boggling!  She is already pretty miserable and still has a few months left to go, so I decided I should help her out a bit. She has 3 kids and a husband to feed and always tries to make home cooked meals. I decided that I should make a bunch of freezer meals. I could keep a few for my husband and myself and give the rest to her. This way her family can still eat home cooked meals, but with very little work on her part. This was the first of my freezer meal adventure.

I have always loved lasagna. It is fairly simple to make and tastes so good. I love that lasagna actually gets better after a day or so of letting it sit. It is a great one to make the day before and not have to do much the next day. It is also a great freezer meal. I like to divide mine between two 8X8 pans, eat one and freeze one. You could even break it into small portions and make a few in bread pans if you are only feeding a couple people.

I got this recipe from my mom. It is the recipe she always made us growing up. She got the recipe from her sister. I have always loved it so thanks Aunt Jackie for a great recipe!


Lasagna

1 lb hamburger
1 small onion
32 oz spaghetti sauce
16 oz ricotta or cottage cheese
2 eggs
1 lb mozzarella cheese
1/2 lb lasagna noodles

Brown hamburger and onion in a large skillet. Cook until no longer pink and onions are soft. Drain meat. Combine meat and spaghetti sauce set aside. In a blender or food processor combine ricotta or cottage cheese and egg. Blend until smooth. This step is optional and isn't really needed if you are using ricotta cheese. Cover the bottom of a 9X13 (or 2 8X8) pan with a small amount of meat sauce. Place uncooked noodles in a single layer over sauce. Spread half of the cheese egg mixture over noodles. Add a layer of meat sauce, more noodles, then cheese mixture, and remaining meat sauce. Cover with grated mozzarella cheese.  Cover with foil and bake at 350 degrees for 1 hour.

* Freezer directions: Before baking lasagna cover with foil or lid and place in freezer for up to 6 months. If you are using 8X8 or 9X9 pans you can actually freeze the lasagna over night. The next day place pan in a small amount of warm water to loosen up the edges. You can then pop the frozen lasagna out of you pan and slip it into a gallon size zip lock bag. Not only does it take up less space in your freezer but you get to keep using your pan. On baking day slide frozen lasagna back into baking dish and let thaw. Once thawed bake as directed above.

You can also bake from frozen, but you won't want to put the cheese on until after it has baked for a while. To bake from frozen place covered lasagna (without cheese) in a cold oven and preheat to 350 degrees. Bake for 1 hr 35 minutes. Uncover and sprinkle with cheese. Bake for another 30 minutes or until bubbly.


If you are using glass pans I recommend you thaw the lasagna first. Even Pyrex pans can shatter with extreme temperature differences (trust me I know).

Wednesday, August 3, 2011

Broccoli Cheese Soup

I know I know, it is summer, so why am I posting soups? I have a few very good reason for posting another soup. First, even though it is summer here, and has been very hot we have had a few days recently that have been rainy with awesome thunderstorms. I feel that a good thunderstorm deserves a good bowl of soup don't you? Second I think that soups shouldn't be restricted to any particular season. I don't limit limit my brownie or ice cream intake to any one given season so why should I limit my soup intake? Last and most important reason is that this soup is PHENOMENAL! It is so basic and fairly simple to make and yet there is a party of deliciousness in my mouth every time I eat it! I have made this soup a few times for my husband and every time he tells me that this could quite possibly be his favorite soup ever. We have eaten this soup by itself or in bread bowls, either way it is fantastic!


Broccoli Cheese Soup


Note: To make my life easier, while the soup is coming together, I put the chopped broccoli in a large glass bowl, cover with saran wrap and microwave for about 3-4 minutes. It cooks perfectly and just in time to add it to the soup.


*Serves 4

1 can chicken broth (about 1 3/4 cups of broth)
1 small onion, diced (or 1 tsp onion powder)
1/3 c. flour
1/4 c. butter
Pepper to taste (I used about 1/2 teaspoon)
2 cups milk
1 1/2 cup shredded cheddar cheese, preferably sharp or extra sharp
1/2 cup shredded swiss cheese
2 1/2 to 3 cups chopped, lightly steamed or blanched broccoli

Simmer chicken broth and chopped onion for 15-20 minutes in a covered small saucepan, until onions are soft. Heat milk in microwave for 1-2 minutes. In a separate medium-sized stockpot, melt butter then add flour and pepper. Cook together for a couple of minutes, then whisk in warmed milk. Stir and heat together on medium-high heat until soup starts to thicken. Next add chicken broth and continue to stir until well blended. Add cheeses and steamed broccoli. Serve immediately.

Recipe Source: Adapted slightly from Mel's Kitchen Cafe

Friday, July 8, 2011

Honey Sweetened Whole Grain Carrot Cake

It was my sister-in-law's birthday at the end of last month and we decided to surprise her with a little family surprise party. I was put in charge of making the cake. This is never a problem because I love any excuse to make a dessert! My sister-in-law is much healthier than I am, and really enjoys using whole grains in everything and not using refined sugar. Since this was her party I decided to make a cake that would be to her liking. When I found this recipe I knew it was perfect for her cake. The only thing I didn't know is whether or not it would taste good. I also like eating healthy things, but they have to taste good! I made a little mini cake to test it out. To my surprise it actually was really good. We even took it over to some friends house and they all liked it too! The only picture I have of it is before we cut it. I decided we shouldn't cut it until the birthday girl got to see it, so sorry for no inside pictures.

Note: This recipe makes 1 8X8 pan. I actually doubled it and divided it between 3 round cake pans. I'm sure the doubled recipe would also work great in a 9X13 pan. I also doubled the frosting. For my 3 layer cake it was enough, but there was no extra and I wish I could have put a little more in between the layers. Also if you are not a huge fan of coconut flavor you can use butter instead of the oil in the frosting. I am not a huge fan of coconut and didn't mind the frosting, but it was getting pretty close to the line of too much for me.


Honey Sweetened Whole Grain Carrot Cake

Ingredients
1/4 cup plus 2 tablespoons of coconut oil
1/4 cup of honey (I added a few extra tbs for good luck)
2 tablespoons of lemon or orange juice
2 eggs
1 tablespoon of vanilla
3 ounces of whole wheat flour, by weight
3 ounces of whole grain oat flour, by weight
1 teaspoon of baking soda
1/2 teaspoon of baking powder
1/2 teaspoon of salt
2 teaspoons of cinnamon
1/2 tsp pumpkin pie spice
1 1/2 cups of shredded carrots (use your food processor shredding disc)
1/4 cup of chopped walnuts (optional- I opted out)
Directions
Heat your oven to 350 degrees F. Grease an 8 x 8 baking dish and set aside.
You want your coconut oil to be in a liquid form for this recipe. That happens at 76 degrees F. If your oil is not warm enough to be liquid, heat it until it is. Be careful not to let it get hot, as it will prematurely cook the eggs in the next step.
Put the coconut oil, honey, orange juice, eggs and vanilla extract into the work bowl of your favorite food processor fitted with a multipurpose blade. Process for two minutes.
Meanwhile, combine the whole wheat flour, whole grain oat flour, baking soda, baking powder, salt, cinnamon and pumpkin pie spice in a large bowl. Whisk to combine well. Add the shredded carrots and walnuts. Stir well.
Add the wet mixture to the dry mixture and stir until just barely combined. Too much stirring will result in a tough carrot cake. Transfer to the greased baking dish. Bake until a toothpick inserted in the center comes out clean, about 35 to 45 minutes.

Honey Sweetened Cream Cheese Frosting

Ingredients
8 ounces of cream cheese, at room temperature
1/4 cup of coconut oil, at room temperature
2 tablespoons of honey

Directions
Beat all three ingredients together until well creamed. You can do this with a stand mixer, hand mixer or with a wooden spoon. I wouldn't recommend the last one unless you are using it as part of your exercise program!

Recipe Source: Heather Krasovec

Wednesday, June 29, 2011

Soft Pretzel Dogs

I love hot dogs. I have always loved hot dogs. As a child I actually didn't like hamburgers so if we ever went to a fast food place my mom would have to take us somewhere that had hot dogs  or else I wouldn't eat anything. My love for hot dogs caries over to all realms of hot dogs. I love hot dogs on a bun, in mac n cheese, corn dogs, pigs in a blanket, and newly added to my list are these soft pretzel dogs! In my last post for homemade soft pretzels I mentioned I would be doing something else with the dough. I wish I could say I thought of this ingenious idea myself, but I didn't. I found this recipe over at Katrina's Kitchen and knew I had to try it. I also need to put a plug in for good hot dogs. There are a million different types of hot dogs out there, but not all hot dogs were made equal. Yes you might be able to get some cheap hot dogs for practically nothing, in fact the store might actually pay you to take them but who knows what is in them! My absolute favorite type of hot dog is Nathan's, and my absolute favorite kind of Nathan's hot dogs are the cheddar dogs. Now if you have had cheese dogs before and didn't like them don't rule these ones out quite yet. They don't have a strong cheese taste, but they have just enough to make them delicious! The best part about Nathan's is that they are all beef. They are kinda pricey (as far as hot dogs are concerned) but to me they are worth the cost!


Soft Pretzel Dogs (I actually halved this recipe and it was enough for 2 dogs, a full size pretzel, and several bites)


Ingredients:
·        1 package active dry yeast (approx. 2 ¼ teaspoons)
·        2 Tablespoons brown sugar
·        1 ¼ teaspoons salt
·        1 ½ cups warm water (110- 115 degrees F)
·        4 cups flour
·        6 cups water
·        6 tablespoons baking soda
·        2 – 3 Tablespoons melted butter
·        Coarse Kosher Salt (optional)

Directions:
1.   In the bowl of your mixer (fitted with dough hook) dissolve yeast, brown sugar and salt in 1 1/2 cups warm water. Mix in flour until you can turn your dough on a floured surface. Knead until smooth and elastic, 6-8 minutes. Place in a greased bowl. Cover, and let rise for one hour. Punch down dough and cover with saran wrap. Place in fridge and let rest over night. (This step is optional, I ran out of time and made them the next day but they turned out so amazing!
2.   The next day take dough out of fridge, cut into 12 pieces. Let the dough rest for 5 minutes. Roll each piece into a 2-3 foot rope.
3.   In a large saucepan, bring water and baking soda to a simmer over medium heat.
4.   Roll your dough around the hot dogs and dip into the baking soda solution for about 20-30 seconds. Place on parchment covered (or greased) baking sheets, and let rise 15-20 minutes.
5.   You could certainly roll your pretzel dough into any shape at this point. I had 6 hot dogs and made the rest into pretzel bites.  6.   Bake at 450 degrees F (230 degrees C) for 8 -10 minutes, or  until golden brown. Brush with melted butter and sprinkle with sea salt.


* I halved this recipe, but I still used the full amount of water and baking soda mixture and it worked out perfect.